Use C++ with OpenCV and cvBlob to perform image processing and object tracking on the Raspberry Pi, using a webcam.
Source code and compiled samples are now available on GitHub. The below post describes the original code on the ‘Master’ branch. As of May 2014, there is a revised and improved version of the project on the ‘rev05_2014’ branch, on GitHub. The README.md details the changes and also describes how to install OpenCV, cvBlob, and all dependencies!
Introduction
As part of a project with a local FIRST Robotics Competition (FRC) Team, I’ve been involved in developing a Computer Vision application for use on the Raspberry Pi. Our FRC team’s goal is to develop an object tracking and target acquisition application that could be run on the Raspberry Pi, as opposed to the robot’s primary embedded processor, a National Instrument’s NI cRIO-FRC II. We chose to work in C++ for its speed, We also decided to test two popular open-source Computer Vision (CV) libraries, OpenCV and cvBlob.
Due to its single ARM1176JZF-S 700 MHz ARM processor, a significant limitation of the Raspberry Pi is the ability to perform complex operations in real-time, such as image processing. In an earlier post, I discussed Motion to detect motion with a webcam on the Raspberry Pi. Although the Raspberry Pi was capable of running Motion, it required a greatly reduced capture size and frame-rate. And even then, the Raspberry Pi’s ability to process the webcam’s feed was very slow. I had doubts it would be able to meet the processor-intense requirements of this project.
Development for the Raspberry Pi
Using C++ in NetBeans 7.2.1 on Ubuntu 12.04.1 LTS and 12.10, I wrote several small pieces of code to demonstrate the Raspberry Pi’s ability to perform basic image processing and object tracking. Parts of the follow code are based on several OpenCV and cvBlob code examples, found in my research. Many of those examples are linked on the end of this article. Examples of cvBlob are especially hard to find.
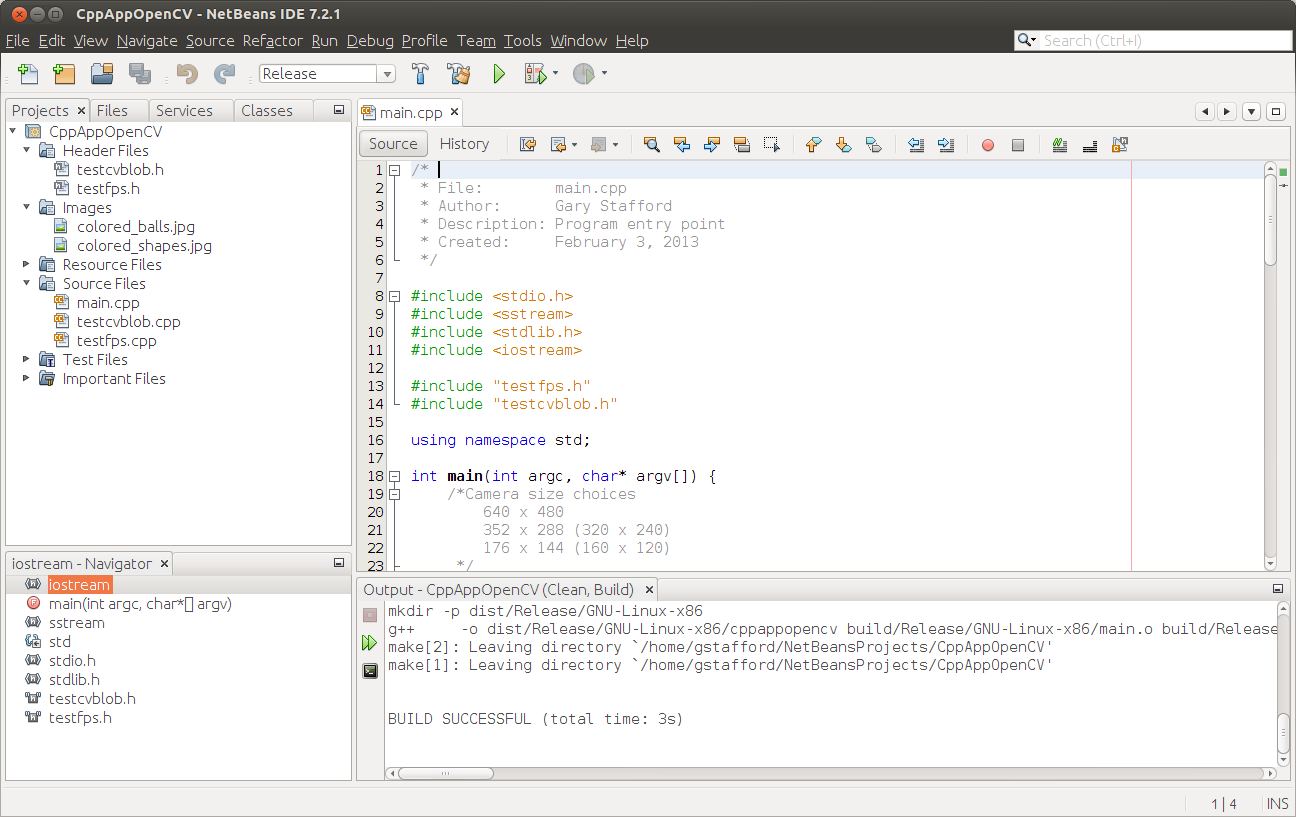
Project in NetBeans
The Code
There are five files: ‘main.cpp’, ‘testfps.cpp (testfps.h)’, and ‘testcvblob.cpp (testcvblob.h)’. The main.cpp file’s main method calls the test methods in the other two files. The cvBlob library only works with the pre-OpenCV 2.0. Therefore, I wrote all the code using the older objects and methods. The code is not written using the latest OpenCV 2.0 conventions. For example, cvBlob uses 1.0’s ‘IplImage’ image type instead 2.0’s newer ‘CvMat’ image type. My next projects is to re-write the cvBlob code to use OpenCV 2.0 conventions and/or find a newer library. The cvBlob library offered so many advantages, I felt not using the newer OpenCV 2.0 features was still worthwhile.
Main Program Method (main.cpp)
| /* | |
| * File: main.cpp | |
| * Author: Gary Stafford | |
| * Description: Program entry point | |
| * Created: February 3, 2013 | |
| */ | |
| #include <stdio.h> | |
| #include <sstream> | |
| #include <stdlib.h> | |
| #include <iostream> | |
| #include "testfps.hpp" | |
| #include "testcvblob.hpp" | |
| using namespace std; | |
| int main(int argc, char* argv[]) { | |
| int captureMethod = 0; | |
| int captureWidth = 0; | |
| int captureHeight = 0; | |
| if (argc == 4) { // user input parameters with call | |
| captureMethod = strtol(argv[1], NULL, 0); | |
| captureWidth = strtol(argv[2], NULL, 0); | |
| captureHeight = strtol(argv[3], NULL, 0); | |
| } else { // user did not input parameters with call | |
| cout << endl << "Demonstrations/Tests: " << endl; | |
| cout << endl << "(1) Test OpenCV - Show Webcam" << endl; | |
| cout << endl << "(2) Test OpenCV - No Webcam" << endl; | |
| cout << endl << "(3) Test cvBlob - Show Image" << endl; | |
| cout << endl << "(4) Test cvBlob - No Image" << endl; | |
| cout << endl << "(5) Test Blob Tracking - Show Webcam" << endl; | |
| cout << endl << "(6) Test Blob Tracking - No Webcam" << endl; | |
| cout << endl << "Input test # (1-6): "; | |
| cin >> captureMethod; | |
| // test 3 and 4 don't require width and height parameters | |
| if (captureMethod != 3 && captureMethod != 4) { | |
| cout << endl << "Input capture width (pixels): "; | |
| cin >> captureWidth; | |
| cout << endl << "Input capture height (pixels): "; | |
| cin >> captureHeight; | |
| cout << endl; | |
| if (!captureWidth > 0) { | |
| cout << endl << "Width value incorrect" << endl; | |
| return -1; | |
| } | |
| if (!captureHeight > 0) { | |
| cout << endl << "Height value incorrect" << endl; | |
| return -1; | |
| } | |
| } | |
| } | |
| switch (captureMethod) { | |
| case 1: | |
| TestFpsShowVideo(captureWidth, captureHeight); | |
| case 2: | |
| TestFpsNoVideo(captureWidth, captureHeight); | |
| break; | |
| case 3: | |
| DetectBlobsShowStillImage(); | |
| break; | |
| case 4: | |
| DetectBlobsNoStillImage(); | |
| break; | |
| case 5: | |
| DetectBlobsShowVideo(captureWidth, captureHeight); | |
| break; | |
| case 6: | |
| DetectBlobsNoVideo(captureWidth, captureHeight); | |
| break; | |
| default: | |
| break; | |
| } | |
| return 0; | |
| } |
Tests 1-2 (testcvblob.hpp)
| // -*- C++ -*- | |
| /* | |
| * File: testcvblob.hpp | |
| * Author: Gary Stafford | |
| * Created: February 3, 2013 | |
| */ | |
| #ifndef TESTCVBLOB_HPP | |
| #define TESTCVBLOB_HPP | |
| int DetectBlobsNoStillImage(); | |
| int DetectBlobsShowStillImage(); | |
| int DetectBlobsNoVideo(int captureWidth, int captureHeight); | |
| int DetectBlobsShowVideo(int captureWidth, int captureHeight); | |
| #endif /* TESTCVBLOB_HPP */ |
Tests 1-2 (testcvblob.cpp)
| /* | |
| * File: testcvblob.cpp | |
| * Author: Gary Stafford | |
| * Description: Track blobs using OpenCV and cvBlob | |
| * Created: February 3, 2013 | |
| */ | |
| #include <cv.h> | |
| #include <highgui.h> | |
| #include <cvblob.h> | |
| #include "testcvblob.hpp" | |
| using namespace cvb; | |
| using namespace std; | |
| // Test 3: OpenCV and cvBlob (w/ webcam feed) | |
| int DetectBlobsNoStillImage() { | |
| /// Variables ///////////////////////////////////////////////////////// | |
| CvSize imgSize; | |
| IplImage *image, *segmentated, *labelImg; | |
| CvBlobs blobs; | |
| unsigned int result = 0; | |
| /////////////////////////////////////////////////////////////////////// | |
| image = cvLoadImage("colored_balls.jpg"); | |
| if (image == NULL) { | |
| return -1; | |
| } | |
| imgSize = cvGetSize(image); | |
| cout << endl << "Width (pixels): " << image->width; | |
| cout << endl << "Height (pixels): " << image->height; | |
| cout << endl << "Channels: " << image->nChannels; | |
| cout << endl << "Bit Depth: " << image->depth; | |
| cout << endl << "Image Data Size (kB): " | |
| << image->imageSize / 1024 << endl << endl; | |
| segmentated = cvCreateImage(imgSize, 8, 1); | |
| cvInRangeS(image, CV_RGB(155, 0, 0), CV_RGB(255, 130, 130), segmentated); | |
| labelImg = cvCreateImage(cvGetSize(image), IPL_DEPTH_LABEL, 1); | |
| result = cvLabel(segmentated, labelImg, blobs); | |
| cvFilterByArea(blobs, 500, 1000000); | |
| cout << endl << "Blob Count: " << blobs.size(); | |
| cout << endl << "Pixels Labeled: " << result << endl << endl; | |
| cvReleaseBlobs(blobs); | |
| cvReleaseImage(&labelImg); | |
| cvReleaseImage(&segmentated); | |
| cvReleaseImage(&image); | |
| return 0; | |
| } | |
| // Test 4: OpenCV and cvBlob (w/o webcam feed) | |
| int DetectBlobsShowStillImage() { | |
| /// Variables ///////////////////////////////////////////////////////// | |
| CvSize imgSize; | |
| IplImage *image, *frame, *segmentated, *labelImg; | |
| CvBlobs blobs; | |
| unsigned int result = 0; | |
| bool quit = false; | |
| /////////////////////////////////////////////////////////////////////// | |
| cvNamedWindow("Processed Image", CV_WINDOW_AUTOSIZE); | |
| cvMoveWindow("Processed Image", 750, 100); | |
| cvNamedWindow("Image", CV_WINDOW_AUTOSIZE); | |
| cvMoveWindow("Image", 100, 100); | |
| image = cvLoadImage("colored_balls.jpg"); | |
| if (image == NULL) { | |
| return -1; | |
| } | |
| imgSize = cvGetSize(image); | |
| cout << endl << "Width (pixels): " << image->width; | |
| cout << endl << "Height (pixels): " << image->height; | |
| cout << endl << "Channels: " << image->nChannels; | |
| cout << endl << "Bit Depth: " << image->depth; | |
| cout << endl << "Image Data Size (kB): " | |
| << image->imageSize / 1024 << endl << endl; | |
| frame = cvCreateImage(imgSize, image->depth, image->nChannels); | |
| cvConvertScale(image, frame, 1, 0); | |
| segmentated = cvCreateImage(imgSize, 8, 1); | |
| cvInRangeS(image, CV_RGB(155, 0, 0), CV_RGB(255, 130, 130), segmentated); | |
| cvSmooth(segmentated, segmentated, CV_MEDIAN, 7, 7); | |
| labelImg = cvCreateImage(cvGetSize(frame), IPL_DEPTH_LABEL, 1); | |
| result = cvLabel(segmentated, labelImg, blobs); | |
| cvFilterByArea(blobs, 500, 1000000); | |
| cvRenderBlobs(labelImg, blobs, frame, frame, | |
| CV_BLOB_RENDER_BOUNDING_BOX | CV_BLOB_RENDER_TO_STD, 1.); | |
| cvShowImage("Image", frame); | |
| cvShowImage("Processed Image", segmentated); | |
| while (!quit) { | |
| char k = cvWaitKey(10)&0xff; | |
| switch (k) { | |
| case 27: | |
| case 'q': | |
| case 'Q': | |
| quit = true; | |
| break; | |
| } | |
| } | |
| cvReleaseBlobs(blobs); | |
| cvReleaseImage(&labelImg); | |
| cvReleaseImage(&segmentated); | |
| cvReleaseImage(&frame); | |
| cvReleaseImage(&image); | |
| cvDestroyAllWindows(); | |
| return 0; | |
| } | |
| // Test 5: Blob Tracking (w/ webcam feed) | |
| int DetectBlobsNoVideo(int captureWidth, int captureHeight) { | |
| /// Variables ///////////////////////////////////////////////////////// | |
| CvCapture *capture; | |
| CvSize imgSize; | |
| IplImage *image, *frame, *segmentated, *labelImg; | |
| int picWidth, picHeight; | |
| CvTracks tracks; | |
| CvBlobs blobs; | |
| CvBlob* blob; | |
| unsigned int result = 0; | |
| bool quit = false; | |
| /////////////////////////////////////////////////////////////////////// | |
| capture = cvCaptureFromCAM(-1); | |
| cvSetCaptureProperty(capture, CV_CAP_PROP_FRAME_WIDTH, captureWidth); | |
| cvSetCaptureProperty(capture, CV_CAP_PROP_FRAME_HEIGHT, captureHeight); | |
| cvGrabFrame(capture); | |
| image = cvRetrieveFrame(capture); | |
| if (image == NULL) { | |
| return -1; | |
| } | |
| imgSize = cvGetSize(image); | |
| cout << endl << "Width (pixels): " << image->width; | |
| cout << endl << "Height (pixels): " << image->height << endl << endl; | |
| frame = cvCreateImage(imgSize, image->depth, image->nChannels); | |
| while (!quit && cvGrabFrame(capture)) { | |
| image = cvRetrieveFrame(capture); | |
| cvConvertScale(image, frame, 1, 0); | |
| segmentated = cvCreateImage(imgSize, 8, 1); | |
| cvInRangeS(image, CV_RGB(155, 0, 0), CV_RGB(255, 130, 130), segmentated); | |
| //Can experiment either or both | |
| cvSmooth(segmentated, segmentated, CV_MEDIAN, 7, 7); | |
| cvSmooth(segmentated, segmentated, CV_GAUSSIAN, 9, 9); | |
| labelImg = cvCreateImage(cvGetSize(frame), IPL_DEPTH_LABEL, 1); | |
| result = cvLabel(segmentated, labelImg, blobs); | |
| cvFilterByArea(blobs, 500, 1000000); | |
| cvRenderBlobs(labelImg, blobs, frame, frame, 0x000f, 1.); | |
| cvUpdateTracks(blobs, tracks, 200., 5); | |
| cvRenderTracks(tracks, frame, frame, 0x000f, NULL); | |
| picWidth = frame->width; | |
| picHeight = frame->height; | |
| if (cvGreaterBlob(blobs)) { | |
| blob = blobs[cvGreaterBlob(blobs)]; | |
| cout << "Blobs found: " << blobs.size() << endl; | |
| cout << "Pixels labeled: " << result << endl; | |
| cout << "center-x: " << blob->centroid.x | |
| << " center-y: " << blob->centroid.y | |
| << endl; | |
| cout << "offset-x: " << ((picWidth / 2)-(blob->centroid.x)) | |
| << " offset-y: " << (picHeight / 2)-(blob->centroid.y) | |
| << endl; | |
| cout << "\n"; | |
| } | |
| char k = cvWaitKey(10)&0xff; | |
| switch (k) { | |
| case 27: | |
| case 'q': | |
| case 'Q': | |
| quit = true; | |
| break; | |
| } | |
| } | |
| cvReleaseBlobs(blobs); | |
| cvReleaseImage(&labelImg); | |
| cvReleaseImage(&segmentated); | |
| cvReleaseImage(&frame); | |
| cvReleaseImage(&image); | |
| cvDestroyAllWindows(); | |
| cvReleaseCapture(&capture); | |
| return 0; | |
| } | |
| // Test 6: Blob Tracking (w/o webcam feed) | |
| int DetectBlobsShowVideo(int captureWidth, int captureHeight) { | |
| /// Variables ///////////////////////////////////////////////////////// | |
| CvCapture *capture; | |
| CvSize imgSize; | |
| IplImage *image, *frame, *segmentated, *labelImg; | |
| CvPoint pt1, pt2, pt3, pt4, pt5, pt6; | |
| CvScalar red, green, blue; | |
| int picWidth, picHeight, thickness; | |
| CvTracks tracks; | |
| CvBlobs blobs; | |
| CvBlob* blob; | |
| unsigned int result = 0; | |
| bool quit = false; | |
| /////////////////////////////////////////////////////////////////////// | |
| cvNamedWindow("Processed Video Frames", CV_WINDOW_AUTOSIZE); | |
| cvMoveWindow("Processed Video Frames", 750, 400); | |
| cvNamedWindow("Webcam Preview", CV_WINDOW_AUTOSIZE); | |
| cvMoveWindow("Webcam Preview", 200, 100); | |
| capture = cvCaptureFromCAM(1); | |
| cvSetCaptureProperty(capture, CV_CAP_PROP_FRAME_WIDTH, captureWidth); | |
| cvSetCaptureProperty(capture, CV_CAP_PROP_FRAME_HEIGHT, captureHeight); | |
| cvGrabFrame(capture); | |
| image = cvRetrieveFrame(capture); | |
| if (image == NULL) { | |
| return -1; | |
| } | |
| imgSize = cvGetSize(image); | |
| cout << endl << "Width (pixels): " << image->width; | |
| cout << endl << "Height (pixels): " << image->height << endl << endl; | |
| frame = cvCreateImage(imgSize, image->depth, image->nChannels); | |
| while (!quit && cvGrabFrame(capture)) { | |
| image = cvRetrieveFrame(capture); | |
| cvFlip(image, image, 1); | |
| cvConvertScale(image, frame, 1, 0); | |
| segmentated = cvCreateImage(imgSize, 8, 1); | |
| //Blue paper | |
| cvInRangeS(image, CV_RGB(49, 69, 100), CV_RGB(134, 163, 216), segmentated); | |
| //Green paper | |
| //cvInRangeS(image, CV_RGB(45, 92, 76), CV_RGB(70, 155, 124), segmentated); | |
| //Can experiment either or both | |
| cvSmooth(segmentated, segmentated, CV_MEDIAN, 7, 7); | |
| cvSmooth(segmentated, segmentated, CV_GAUSSIAN, 9, 9); | |
| labelImg = cvCreateImage(cvGetSize(frame), IPL_DEPTH_LABEL, 1); | |
| result = cvLabel(segmentated, labelImg, blobs); | |
| cvFilterByArea(blobs, 500, 1000000); | |
| cvRenderBlobs(labelImg, blobs, frame, frame, CV_BLOB_RENDER_COLOR, 0.5); | |
| cvUpdateTracks(blobs, tracks, 200., 5); | |
| cvRenderTracks(tracks, frame, frame, CV_TRACK_RENDER_BOUNDING_BOX, NULL); | |
| red = CV_RGB(250, 0, 0); | |
| green = CV_RGB(0, 250, 0); | |
| blue = CV_RGB(0, 0, 250); | |
| thickness = 1; | |
| picWidth = frame->width; | |
| picHeight = frame->height; | |
| pt1 = cvPoint(picWidth / 2, 0); | |
| pt2 = cvPoint(picWidth / 2, picHeight); | |
| cvLine(frame, pt1, pt2, red, thickness); | |
| pt3 = cvPoint(0, picHeight / 2); | |
| pt4 = cvPoint(picWidth, picHeight / 2); | |
| cvLine(frame, pt3, pt4, red, thickness); | |
| cvShowImage("Webcam Preview", frame); | |
| cvShowImage("Processed Video Frames", segmentated); | |
| if (cvGreaterBlob(blobs)) { | |
| blob = blobs[cvGreaterBlob(blobs)]; | |
| pt5 = cvPoint(picWidth / 2, picHeight / 2); | |
| pt6 = cvPoint(blob->centroid.x, blob->centroid.y); | |
| cvLine(frame, pt5, pt6, green, thickness); | |
| cvCircle(frame, pt6, 3, green, 2, CV_FILLED, 0); | |
| cvShowImage("Webcam Preview", frame); | |
| cvShowImage("Processed Video Frames", segmentated); | |
| cout << "Blobs found: " << blobs.size() << endl; | |
| cout << "Pixels labeled: " << result << endl; | |
| cout << "center-x: " << blob->centroid.x | |
| << " center-y: " << blob->centroid.y | |
| << endl; | |
| cout << "offset-x: " << ((picWidth / 2)-(blob->centroid.x)) | |
| << " offset-y: " << (picHeight / 2)-(blob->centroid.y) | |
| << endl; | |
| cout << "\n"; | |
| } | |
| char k = cvWaitKey(10)&0xff; | |
| switch (k) { | |
| case 27: | |
| case 'q': | |
| case 'Q': | |
| quit = true; | |
| break; | |
| } | |
| } | |
| cvReleaseBlobs(blobs); | |
| cvReleaseImage(&labelImg); | |
| cvReleaseImage(&segmentated); | |
| cvReleaseImage(&frame); | |
| cvReleaseImage(&image); | |
| cvDestroyAllWindows(); | |
| cvReleaseCapture(&capture); | |
| return 0; | |
| } |
Tests 2-6 (testfps.hpp)
// -*- C++ -*-
/*
* File: testfps.hpp
* Author: Gary Stafford
* Created: February 3, 2013
*/
#ifndef TESTFPS_HPP
#define TESTFPS_HPP
int TestFpsNoVideo(int captureWidth, int captureHeight);
int TestFpsShowVideo(int captureWidth, int captureHeight);
#endif /* TESTFPS_HPP */
Tests 2-6 (testfps.cpp)
/*
* File: testfps.cpp
* Author: Gary Stafford
* Description: Test the fps of a webcam using OpenCV
* Created: February 3, 2013
*/
#include <cv.h>
#include <highgui.h>
#include <time.h>
#include <stdio.h>
#include "testfps.hpp"
using namespace std;
// Test 1: OpenCV (w/ webcam feed)
int TestFpsNoVideo(int captureWidth, int captureHeight) {
IplImage* frame;
CvCapture* capture = cvCreateCameraCapture(-1);
cvSetCaptureProperty(capture, CV_CAP_PROP_FRAME_WIDTH, captureWidth);
cvSetCaptureProperty(capture, CV_CAP_PROP_FRAME_HEIGHT, captureHeight);
time_t start, end;
double fps, sec;
int counter = 0;
char k;
time(&start);
while (1) {
frame = cvQueryFrame(capture);
time(&end);
++counter;
sec = difftime(end, start);
fps = counter / sec;
printf("FPS = %.2f\n", fps);
if (!frame) {
printf("Error");
break;
}
k = cvWaitKey(10)&0xff;
switch (k) {
case 27:
case 'q':
case 'Q':
break;
}
}
cvReleaseCapture(&capture);
return 0;
}
// Test 2: OpenCV (w/o webcam feed)
int TestFpsShowVideo(int captureWidth, int captureHeight) {
IplImage* frame;
CvCapture* capture = cvCreateCameraCapture(-1);
cvSetCaptureProperty(capture, CV_CAP_PROP_FRAME_WIDTH, captureWidth);
cvSetCaptureProperty(capture, CV_CAP_PROP_FRAME_HEIGHT, captureHeight);
cvNamedWindow("Webcam Preview", CV_WINDOW_AUTOSIZE);
cvMoveWindow("Webcam Preview", 300, 200);
time_t start, end;
double fps, sec;
int counter = 0;
char k;
time(&start);
while (1) {
frame = cvQueryFrame(capture);
time(&end);
++counter;
sec = difftime(end, start);
fps = counter / sec;
printf("FPS = %.2f\n", fps);
if (!frame) {
printf("Error");
break;
}
cvShowImage("Webcam Preview", frame);
k = cvWaitKey(10)&0xff;
switch (k) {
case 27:
case 'q':
case 'Q':
break;
}
}
cvDestroyWindow("Webcam Preview");
cvReleaseCapture(&capture);
return 0;
}
Compiling Locally on the Raspberry Pi
After writing the code, the first big challenge was cross-compiling the native C++ code, written on Intel IA-32 and 64-bit x86-64 processor-based laptops, to run on the Raspberry Pi’s ARM architecture. After failing to successfully cross-compile the C++ source code using crosstools-ng, mostly due to my lack of cross-compiling experience, I resorted to using g++ to compile the C++ source code directly on the Raspberry Pi.
First, I had to properly install the various CV libraries and the compiler on the Raspberry Pi, which itself is a bit daunting.
Compiling OpenCV 2.4.3, from the source-code, on the Raspberry Pi took an astounding 8 hours. Even though compiling the C++ source code takes longer on the Raspberry Pi, I could be assured the complied code would run locally. Below are the commands that I used to transfer and compile the C++ source code on my Raspberry Pi.
Copy and Compile Commands
| scp *.jpg *.cpp *.h {your-pi-user}@{your.ip.address}:your/file/path/ | |
| ssh {your-pi-user}@{your.ip.address} | |
| cd ~/your/file/path/ | |
| g++ `pkg-config opencv cvblob --cflags --libs` testfps.cpp testcvblob.cpp main.cpp -o FpsTest -v | |
| ./FpsTest |

Compiling Program on Raspberry Pi
Special Note About cvBlob on ARM
At first I had given up on cvBlob working on the Raspberry Pi. All the cvBlob tests I ran, no matter how simple, continued to hang on the Raspberry Pi after working perfectly on my laptop. I had narrowed the problem down to the ‘cvLabel’ method, but was unable to resolve. However, I recently discovered a documented bug on the cvBlob website. It concerned cvBlob and the very same ‘cvLabel’ method on ARM-based devices (ARM = Raspberry Pi!). After making a minor modification to cvBlob’s ‘cvlabel.cpp’ source code, as directed in the bug post, and re-compiling on the Raspberry Pi, the test worked perfectly.
Testing OpenCV and cvBlob
The code contains three pairs of tests (six total), as follows:
- OpenCV (w/ live webcam feed)
Determine if OpenCV is installed and functioning properly with the complied C++ code. Capture a webcam feed using OpenCV, and display the feed and frame rate (fps). - OpenCV (w/o live webcam feed)
Same as Test #1, but only print the frame rate (fps). The computer doesn’t need display the video feed to process the data. More importantly, the webcam’s feed might unnecessarily tax the computer’s processor and GPU. - OpenCV and cvBlob (w/ live webcam feed)
Determine if OpenCV and cvBlob are installed and functioning properly with the complied C++ code. Detect and display all objects (blobs) in a specific red color range, contained in a static jpeg image. - OpenCV and cvBlob (w/o live webcam feed)
Same as Test #3, but only print some basic information about the static image and number of blobs detected. Again, the computer doesn’t need display the video feed to process the data. - Blob Tracking (w/ live webcam feed)
Detect, track, and display all objects (blobs) in a specific blue color range, along with the largest blob’s positional data. Captured with a webcam, using OpenCV and cvBlob. - Blob Tracking (w/o live webcam feed)
Same as Test #5, but only display the largest blob’s positional data. Again, the computer doesn’t need the display the webcam feed, to process the data. The feed taxes the computer’s processor unnecessarily, which is being consumed with detecting and tracking the blobs. The blob’s positional data it sent to the robot and used by its targeting system to position its shooting platform.
The Program
There are two ways to run this program. First, from the command line you can call the application and pass in three parameters. The parameters include:
- Test method you want to run (1-6)
- Width of the webcam capture window in pixels
- Height of the webcam capture window in pixels.
An example would be ‘./TestFps 2 640 480’ or ‘./TestFps 5 320 240’.
The second method to run the program and not pass in any parameters. In that case, the program will prompt you to input the test number and other parameters on-screen.

Input Options for Application
Test 1: Laptop versus Raspberry Pi
")
Test 1: Displaying Webcam Feed using OpenCV (laptop)
")
Test 1: Displaying Webcam Feed using OpenCV (Raspberry Pi)
Test 3: Laptop versus Raspberry Pi
")
Test 3: Detecting Red Color Range in Static Image using OpenCV and cvBlob (laptop)
")
Test 3: Detecting Red Color Range in Static Image using OpenCV and cvBlob (Raspberry Pi)
")
Test 5: Detecting Objects within Blue Color Range using OpenCV and cvBlob (laptop)
Test 5: Laptop versus Raspberry Pi
")
Test 5: Detecting Objects within Blue Color Range using OpenCV and cvBlob (Raspberry Pi)
The Results
Each test was first run on two Linux-based laptops, with Intel 32-bit and 64-bit architectures, and with two different USB webcams. The laptops were used to develop and test the code, as well as provide a baseline for application performance. Many factors can dramatically affect the application’s ability do image processing. They include the computer’s processor(s), RAM, HDD, GPU, USB, Operating System, and the webcam’s video capture size, compression ratio, and frame-rate. There are significant differences in all these elements when comparing an average laptop to the Raspberry Pi.
Frame-rates on the Intel processor-based Ubuntu laptops easily performed at or beyond the maximum 30 fps rate of the webcams, at 640 x 480 pixels. On a positive note, the Raspberry Pi was able to compile and execute the tests of OpenCV and cvBlob (see bug noted at end of article). Unfortunately, at least in my tests, the Raspberry Pi could not achieve more than 1.5 – 2 fps at most, even in the most basic tests, and at a reduced capture size of 320 x 240 pixels. This can be seen in the first and second screen-grabs of Test #1, above. Although, I’m sure there are ways to improve the code and optimize the image capture, the results were much to slow to provide accurate, real-time data to the robot’s targeting system.
Links of Interest
Static Test Images Free from: http://www.rgbstock.com/
Great Website for OpenCV Samples: http://opencv-code.com/
Another Good Website for OpenCV Samples: http://opencv-srf.blogspot.com/2010/09/filtering-images.html
cvBlob Code Sample: https://code.google.com/p/cvblob/source/browse/samples/red_object_tracking.cpp
Detecting Blobs with cvBlob: http://8a52labs.wordpress.com/2011/05/24/detecting-blobs-using-cvblobs-library/
Best Post/Script to Install OpenCV on Ubuntu and Raspberry Pi: http://jayrambhia.wordpress.com/2012/05/02/install-opencv-2-3-1-and-simplecv-in-ubuntu-12-04-precise-pangolin-arch-linux/
Measuring Frame-rate with OpenCV: http://8a52labs.wordpress.com/2011/05/19/frames-per-second-in-opencv/
OpenCV and Raspberry Pi: http://mitchtech.net/raspberry-pi-opencv/

#1 by Kang Kamal on February 20, 2013 - 7:09 pm
how to change camera parameters on Raspi ..?
I’ve replaced
CvCapture * capture = cvCreateCameraCapture (-1);
‘(-1)’ With ‘(0)’, ‘(1)’, ‘(2)’, ‘(CV_CAP_ANY)’ and the other but no effect.
I use a Logitech camera that has been verified by the raspberries, I’ve tried to install a webcam but not detected (No Device Found), please help me 😦
sorry bad english 🙂
#2 by Gary A. Stafford on February 21, 2013 - 10:48 pm
I assume you are using Linux? I suggest trying to GUVCviewer to ensure webcam is compatible with Linux. If it works here, it will work with OpenCV.
#3 by Kang Kamal on May 16, 2013 - 10:17 am
i use luvcview n work fine, i’m trying with cheese, guvcview n camorama works fine too, but i try with openCV, i’m always got NULL
i’m using this code :
CvCapture*capture = cvCaptureFromCAM ( CV_CAP_ANY );
if (!capture)
{blablabla “NULL”
}
thanks n i need u’re help.. 🙂
#4 by Kang Kamal on July 31, 2013 - 8:11 pm
hey mr,. i using python camera work normally, but i using Codeblocks (C++) still null,.. really need help,. 😦
#5 by Jo on March 8, 2013 - 12:23 am
Hi Gary,
Until I read your post I was under the impression that Pi can be used for real time motion detection but what you have written i can not do it.
#6 by Ivan on March 27, 2013 - 2:59 am
What about black&white video stream processing? And what about detecting coordinates of only moving particles?
#7 by Joakim on April 13, 2013 - 7:01 am
You should check out “motion” for raspberry pi. It is a project that alows webcam-streaming and highlighting of the moving parts of the stream. It makes a “ghost shadow” over the moving parts before displaying them. You can probably use that s a detector for the coordinates of the moving particles.
#8 by Gary A. Stafford on April 15, 2013 - 9:16 pm
Thanks, I actually have a post on here detailing how to implement motion for the Raspberry Pi.
#9 by anaysonawane on March 28, 2013 - 4:00 pm
Hello thanks for sharing such a great tutorial.I am doing my project on friendly arm 6410.I need to cross compile cvBlob library for it.Can you please help me regarding cross compilation of it?
Thanks in advance.
#10 by andymule on April 2, 2013 - 2:44 am
nice.
#11 by Viet on May 9, 2013 - 1:41 am
Can i connect with a USB webcam?In Vietnam, i can’t found camera module…
#12 by thesuisse on May 19, 2013 - 7:51 pm
Hello very nice your proyect, I think it would be better if you convert to HSV Color space.
regards
#13 by Danny on May 28, 2013 - 10:02 am
Agreed about HSV. If the color of the object is uniform, then it will be very tolerant on changes of shading.
#14 by Ken on June 2, 2013 - 7:00 pm
Thanks so much for posting your findings and code… it will help me past some major hurdles. However, when I run FpsTest 1 640 480 I get “(Webcam Preview:2477): Gtk-WARNING **: cannot open display: 192.168.1.133:0.0”.
I’ve tried
– disabling LXDE on startup
– ssh’ing as root
– export DISPLAY=192.168.1.133:0.0 (currently the DISPLAY variable is empty)
But I’m still getting the error. I’m a Linux novice, any guidances is greatly appreciated!
#15 by Ken on June 4, 2013 - 11:44 am
Looking deeper, I see cvQueryFrame is returning NULL. Searching the web shows other folks with this issue were able to fix it by compiling OpenCV with ffmpeg library… did you need to do that by chance?
#16 by foo on June 16, 2013 - 2:25 am
Did you try ‘ssh -X’?
#17 by harshvardhan on June 20, 2013 - 10:37 am
my code compiles without any errors but then it shows(after ./a.out), Xlib: extension “RANDR” missing on display “:10”.
what can be the possible reason for this
#18 by herwindra on August 13, 2013 - 7:20 pm
ya aku juga mengalami hal yang sama, bagaimana solusinya?
yes, I also experienced the same thing, what’s the solution?
#19 by Henry on December 19, 2013 - 3:07 am
Hi friend,
For C language(Not C++), can use cvblob library? because I am writing c code with cvblob, but always error “cvblob.h:33:20: fatal error: iostream: No such file or directory
compilation terminated.” How? Thanks for your help!!
#20 by Gary A. Stafford on December 19, 2013 - 10:19 pm
I saw you got an answer at http://answers.opencv.org/question/25699/c-language-can-use-cvblob/.
#21 by Abhishek on July 15, 2013 - 11:01 pm
where do i get testfps.h ans testcvblob.h?
#22 by Graham on October 9, 2013 - 3:38 pm
My first reaction is: would it not be better to put the code on github for example rather than dropbox?
#23 by Gary A. Stafford on October 23, 2013 - 9:13 pm
Thanks for the suggestion regarding GitHub. I switched from DropBox to GitHub and GitHub Gists for my most recent post.
#24 by zhaomeijun on December 3, 2013 - 4:48 am
Hi Gary,
May I get to know more detailed info/procedures about how to install cvblob in raspberry pi? Thanks.
#25 by Gary A. Stafford on December 3, 2013 - 9:39 pm
The best resource I’ve found is Paranoid Android at http://jayrambhia.wordpress.com/2012/06/20/install-opencv-2-4-in-ubuntu-12-04-precise-pangolin/
#26 by Zichun on December 3, 2013 - 4:52 am
Hi, Gary,
How to install cvBlob in Linux with OpenCV? like Windows?
I am doing humanoid robot vision, I want to use cvBlob.
#27 by Gary A. Stafford on December 3, 2013 - 9:49 pm
There might be some videos on YouTube. I watched and followed along with this series https://www.youtube.com/watch?v=2i2bt-YSlYQ&feature=youtube_gdata_player
#28 by Gary A. Stafford on December 3, 2013 - 9:52 pm
Try this https://www.youtube.com/watch?v=cgo0UitHfp8&feature=youtube_gdata_player
#29 by Jennifer Dos Reis on January 16, 2014 - 11:34 am
Thank you VERY much for your “Note About cvBlob on ARM”, it saved me!
#30 by Yggdrasil on February 27, 2014 - 4:49 pm
Hi,
I was experimenting with the cvBlobs library some time ago and wrote an own algorithm to speed up the detection in gray scale images. This algo runs in O(width*height). Probably it could speed up the detection on RPi.
I do not published it as own lib, but as subproject here: https://github.com/YggdrasiI/KinectGrid/tree/master/lib/blobtree
Unfortunately the Kinect never worked on my Pi due to usb transfer issues.
Now, with the raspi cam I could try to continue my little experiments.
I’m currently search a way, to evaluate the blob detection on RPi’s GPU. I has no idea how difficult this could be. I should begin with an easier task and compile and test out your project
Regards Yggdrasil
#31 by Ivan on April 25, 2014 - 5:33 pm
Hi, I´m new in this kind of stuff. I have a school project: it involves a code developed in OpenCv, which runs in a Linux computer and gives positions (coordinates); and them have to be sent to the raspberry py,which controls the position of two servomotors. Do you know any way to comunicate opencv (running in the computer), with the raspberri py? thanks in advance
#32 by Gary A. Stafford on April 26, 2014 - 8:42 am
I would use sockets for peer-to-peer communication. Very common and easy to implement in many languages. Lots of good, simple examples on internet.
Basic explanation: http://docs.oracle.com/javase/tutorial/networking/sockets/definition.html
Bash: http://linux.die.net/man/1/nc
Bash: http://hacktux.com/bash/socket
Python: https://docs.python.org/2/howto/sockets.html
Java: http://docs.oracle.com/javase/tutorial/networking/sockets/clientServer.html
#33 by MarcoRam on April 28, 2014 - 8:20 pm
Thanks!!!!!!! 😀
#34 by Tim on June 13, 2014 - 12:58 am
Have you got this to work with a RPi camera?
#35 by rando on June 29, 2014 - 2:58 pm
Have you tried using a playstation 3 eye? I used one of those on a project that was powered by an old atom netbook. Using the netbook’s built in cam the performance was terrible. Using the ps3 eye the fps was greatly improved. I guess it does a lot of on board processing and can get 120 fps.
#36 by 顏義翔 on August 7, 2014 - 9:46 am
Hello,
why your FPS are so fast?
I use the OpenCV with python on Raspberry PI, but I feel my FPS is too slow!
it’s my code:
===========================================================================
import cv2.cv as cv
from time import sleep
capture = cv.CaptureFromCAM(0)
cv.SetCaptureProperty(capture, 3, 320)
cv.SetCaptureProperty(capture, 4, 240)
while True:
img = cv.QueryFrame(capture)
cv.Smooth(img, img, cv.CV_BLUR,3)
hue_img = cv.CreateImage(cv.GetSize(img), 8, 3)
cv.CvtColor(img, hue_img, cv.CV_BGR2HSV)
threshold_img = cv.CreateImage(cv.GetSize(hue_img),8 ,1)
cv.InRangeS(hue_img, (38,120,60), (75,255,255), threshold_img)
storage = cv.CreateMemStorage(0)
contour = cv.FindContours(threshold_img, storage, cv.CV_RETR_CCOMP, cv.CV_CHAIN_APPROX_SIMPLE)
points = []
while contour:
rect = cv.BoundingRect(list(contour))
contour = contour.h_next()
size = (rect[2] * rect [3])
diag = (rect[2]**2 + rect[3]**2)**0.5
if size > 100: #set trigger
pt1 = (rect[0], rect[1]) #left top
pt2 = (rect[0]+rect[2], rect[1]+rect[3]) #right bottom
cv.Rectangle(img, pt1, pt2, (255,0,0)) #draw rectangle 38,160,60
#print(str(pt1)+str(pt2)+str(size)+’ ‘+str(diag))
#print(str(diag)),
#if (rect[0]+rect[2])/2 >160
sleep(0.01)
#if diag > 180:
#motor.backward()
#elif diag > 10:
#motor.forward()
#else:
#motor.turnLeft()
#else:
#motor.stop()
#sleep(0.1)
#cv.ShowImage(“Colour Tracking”, img)
#cv.ShowImage(“Threshold”, threshold_img)
if cv.WaitKey(10) == 27:
break
=========================================================================
what’s the problem of my code?
#37 by rachmatak on August 19, 2014 - 4:29 am
dear Gary A. Stafford
i’m finally do all of them tutorial how to install opencv and cvblob from
https://github.com/garystafford/object-tracking-blogpost
and i’m stuck on step “# run object tracking application
cd ~/object-tracking-blogpost/CppAppOpenCV/dist/Release/GNU-Linux-x86
./cppappopencv”
on my terminal raspberry said
“./cppappopencv: error while loading shared libraries: cv2.so: cannot open shared object file: No such file or directory.
please help.
i’m student and my final project using image processing with raspberry pi.
i hope i can chat personally with you sir.
thanks.
#38 by amgalbu on August 25, 2014 - 11:33 am
Hi Gary
I was trying to build an application based on cvblob on Raspberry Pi. However, when the cvLabel (:..) function is executed, the CPU usage goes to 100% and nothing else happens. Do you have any suggestion bout this issue?
#39 by amgalbu on August 25, 2014 - 11:43 am
Hi Gary
I can reply to my same post: there was another place in the source (cvlabel.cpp) where some array defined as “char2 required to be defined as “signed char”
#40 by swaroop on September 14, 2014 - 9:20 am
I am working on a project based on pick and place concept. Great that cvBlob gives the coordinates of the centroid. I would like to know the coordinates of the edge or the orientation of the object axis with respect to camera. Sothat, robot can grip it properly. I would be really glad, if you can help.
thank you
#41 by Brian T on February 10, 2015 - 10:42 pm
Is there a way to have it move motors tell the camera is centered.
#42 by Fajar_K on June 28, 2015 - 11:54 am
Hey Guys i have a problem when a try this project, problem is HIGHGUI ERROR: V4L : index 1 is not correct!
Can Anybody help me from this problem, i am so tired with many problem in linux
Please
#43 by Nabila on August 16, 2015 - 7:37 pm
Hey Gary! Thanks for the great insight.
I’m actually doing a project very similar to yours: I’m using the raspberry pi for image processing and I want it to communicate co-ordinates to a vex cortex processor to move a bot to face, say a person. I’m having trouble with working the vex uart to communicate with the pi…do you have anything that could help?
#44 by aminudin on December 9, 2015 - 2:52 am
hello, I am new in linux and opencv
i follow your tutorial from github, but get this error in this step
# build project (compile object tracking application)
cd ~/object-tracking-blogpost/CppAppOpenCV
make -f nbproject/Makefile-Release.mk QMAKE= SUBPROJECTS= .build-conf
this is the error messages
“make” -f nbproject/Makefile-Release.mk dist/Release/GNU-Linux-x86/cppappopencv
make[1]: Entering directory `/home/aminudin/opencv/project/object-tracking-blogpost/CppAppOpenCV’
make[1]: *** No rule to make target `/usr/local/lib/libopencv_contrib.so’, needed by `dist/Release/GNU-Linux-x86/cppappopencv’. Stop.
make[1]: Leaving directory `/home/aminudin/opencv/project/object-tracking-blogpost/CppAppOpenCV’
make: *** [.build-conf] Error 2
I really Appreciate your help
#45 by Sarthak on January 16, 2016 - 1:26 pm
Thank you Gary. It was an awesome post and was just what I was looking for. I wanted to determine the extent to which my Raspi 2B would fit my (hopeful) project, which involves on board Visual Slam and Obstacle Avoidance on a quadcopter. It seems clear from your post that even though we might get a bump in frame rates with some optimization technique or sorts, but it will never be high enough for actual real-time data to the intended system. Let alone EKF and such stuff.
But can you recommend me some platform that is capable of doing it. I’ve seen plenty videos with Intel Atom processors being able to do all the real time processing on board. What is your say on this?
#46 by Mehmet Erol Sanliturk on February 3, 2016 - 2:20 pm
In Github repository and here , there is no an explicit license information about your code . If you supply a license name , it may be useful for the possible usage decisions .
This is a very nice tutorial .
Thank you very much .
#47 by Christina on November 26, 2016 - 4:05 am
Hi, do you know how I can go about connecting my raspberry pi camera to the raspberry pi model 3b take an image of a dice and display what value it is?
Thanks
#48 by Gary A. Stafford on November 26, 2016 - 8:33 pm
OpenCV – http://stackoverflow.com/questions/18211832/counting-the-pips-on-dice-using-opencv
#49 by Hinesh on September 18, 2017 - 5:25 am
Hi Gary,
I am also working on the “tracking “project so while searching on net I have came across your Blog. ( I am basically new for object tracking).It’s very good tutorial for object tracking using open CV.
As per the instruction (given on github) I have downloaded and installed all the components. And I when I try to build the project using following step,
# build project (compile object tracking application)
cd ~/object-tracking-blogpost/CppAppOpenCV
make -f nbproject/Makefile-Release.mk QMAKE= SUBPROJECTS= .build-conf
I am getting error,
make[1]: *** No rule to make target ‘/usr/local/lib/libopencv_contrib.so’, needed by ‘dist/Release/GNU-Linux-x86/cppappopencv’. Stop.
I have looked up online and found that I have to install opencv-contrib library also. But after doing that and path give still I am getting the same error.
Could you please help me to resolve the issue. It will be a great help.
Thanks,
Hinesh